May 13, 2020
Phone Photography Challenge // Week One: Light
For anyone following me on Instagram, you may have seen that I started a phone photography challenge this week. All you need is the camera on your smartphone, and a free editing app (like VSCO or Lightroom Mobile). I hope you learn something new and have fun getting your creative juices flowing!
For this first week we are focusing on LIGHT because that is ultimately what makes or breaks an image. This week I shared advice and tips on instagram on learning to notice and use natural light to take better pictures with your phone.

Inside Light Tips:
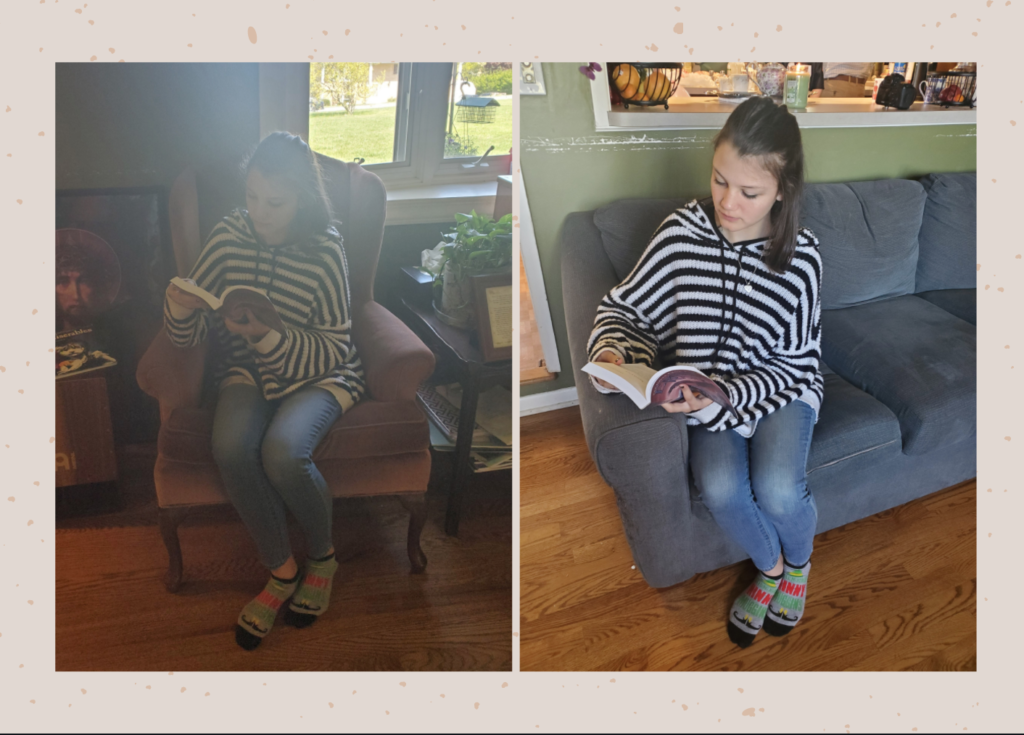
-Use a window as your source of light but be careful of putting the window behind your subject.
-Turn off any artificial lights in the room (you don’t want to use natural and artificial light together).
-Notice and use shadows and morning/evening light but be careful to not cast a shadow (even a light one) on your subject by standing directly between the window and your subject.
Avoiding Haze:
One problem with taking photos inside is that there is such a huge difference in the brightness outside vs inside (especially if you have followed my advice and turned off any artificial light). So if you put your subject in front of a window, your camera will properly expose for your subject but then the window light will be WAY too bright and will create a hazy effect on your image. This is why it is so important to have the window light hitting your subject from the front.
Outside Light Tips:
-Determine your photo location based on the location of the sun.
-Notice the difference in the light in the early morning, the middle of the day, and the evening. (You won’t be able to get a “glowly” picture in the middle of the day.)
-Utilize backlighting when at all possible (especially when photographing people).
Backlighting:
Backlighting is when your subject is illuminated from behind. This means that you will place the light source behind your subject and in front of you (the photographer). This creates the most beautiful glow around your subject and the most flattering light for people portraits. It also takes away harsh shadows and squinting in the sun.
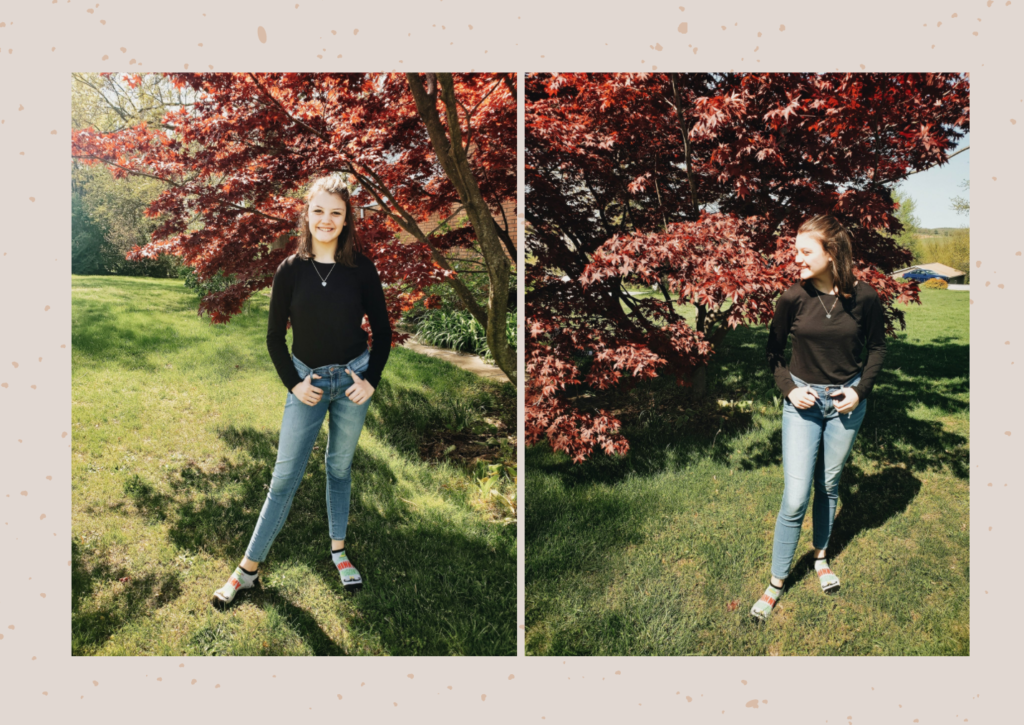
Direct light (where the light is directly in front of your subject) is not necessarily bad, it just creates a completely different feel for the image. However, when it comes to taking pictures of people, backlighting is almost always more flattering.
Morning/Evening Light:
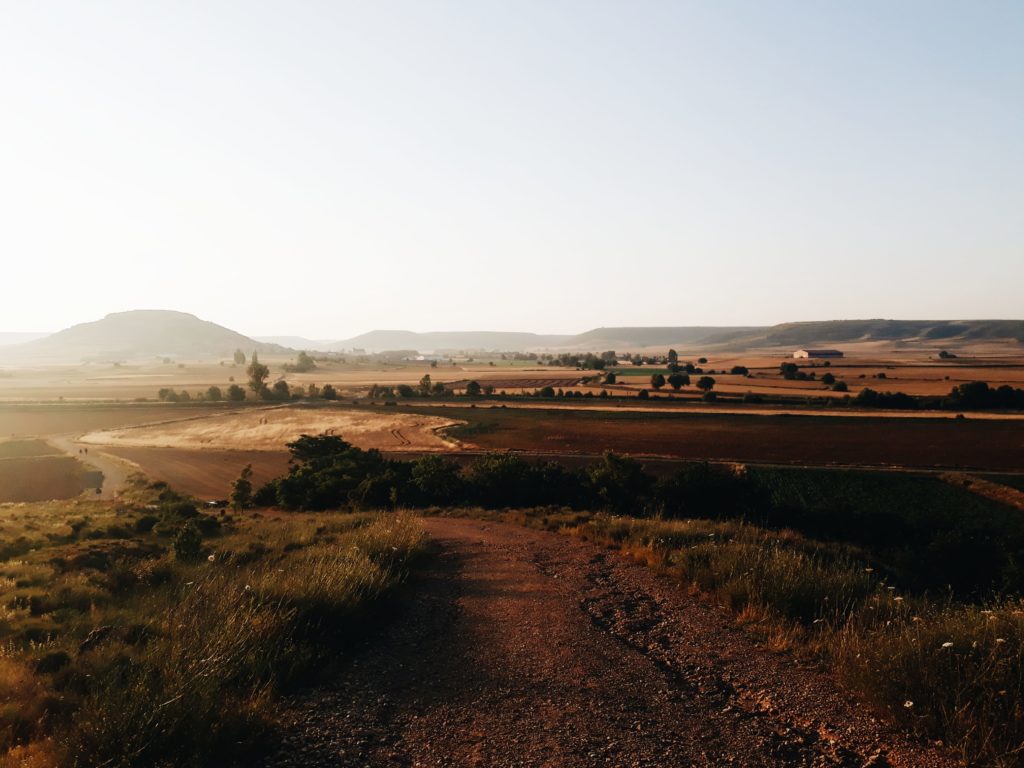
The sunlight during the first two hours after the sunrise and the last two hours before the sunset is vastly different than any other time of day. This is because the sun is closer to the horizon in this time frame and this allows for soft, beautiful orange, glowly light. This light will give you the best backlighting and the most dramatic shadows. I would encourage you to pay extra close attention to the morning/evening light during this week.
There are two challenges this week:
- INSIDE: Take a photo inside using natural light creatively (shadows, glowly morning or evening light, etc).
- OUTSIDE: Take a photo outside using natural light well (backlighting, or glowly morning or evening light, etc).
If you want to participate, all you have to do is share the images you take for one or both of the challenges on Friday on Instagram or Facebook and tag me in them!
I can’t wait to see what you all create!
Xoxo,
Mary Kate
[…] (Last week’s theme was LIGHT and you can read all about here.) […]
[…] Three is all about the beautiful outdoors, using what we learned in week one and two, and our knowledge of light and color, we will focus on flowers and landscapes and learn […]
Share Post:
2 Comments on Phone Photography Challenge // Week One: Light